
Back-to-School Drop Zones & Mudroom Hacks to Save Your Sanity
Whether you have a formal mudroom, a sliver of hallway by the front door, or you’re working with the corner of the kitchen, the back-to-school season has a way of turning every surface into a chaotic pile of shoes, papers, and half-eaten granola bars.
Let’s fix that.
This guide is packed with realistic, functional ideas for creating a “drop zone” that works for your family, your space, and your budget—so that before-school mornings are smoother and after-school clutter doesn’t swallow your house.
Some links & partners pay me a little something if you make a purchase. I’m building my network with brands focused on sustainable home decor, food, and unique gifts. If you want to support my work, shopping through these links makes a big difference. Thanks for backing thoughtful content!
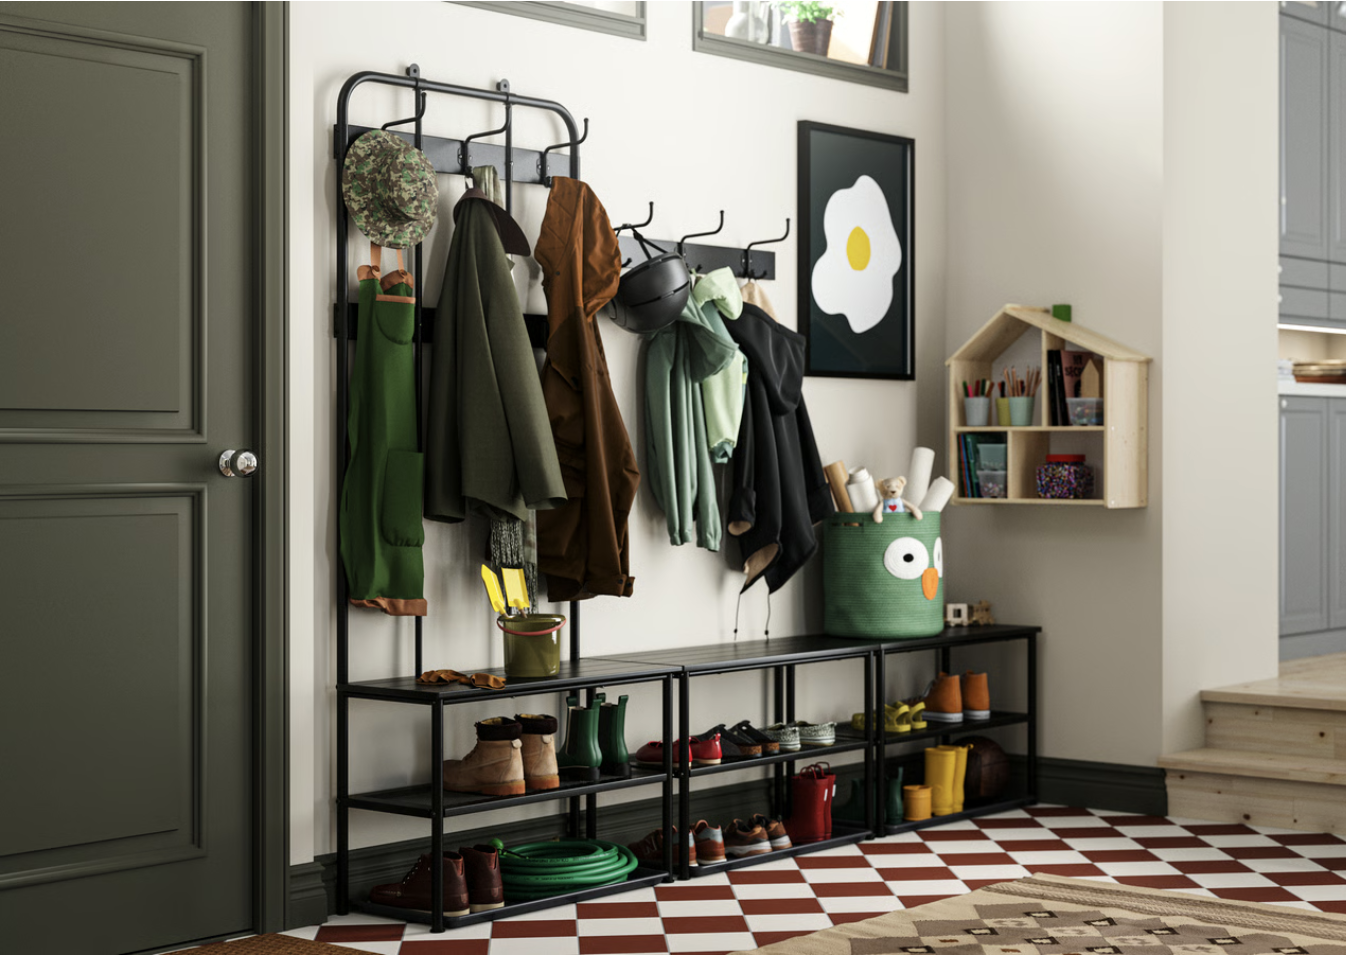
Source: IKEA
What Is a Drop Zone (and Why Do You Need One)?
A drop zone is the landing pad for all the stuff—backpacks, jackets, lunch boxes, forms from school, homework folders, musical instruments, sports gear, etc. Without one, your home becomes a clutter obstacle course. With one? You reclaim your floor, your countertops, and your sanity.
The best drop zones are:
Easy to maintain
Tailored to your family’s real habits
Simple enough for even the most scatterbrained kid (or adult) to use
Pick Your Zone: Where Will It Live?
Choose the first place your kids land. If they always enter through the garage? That’s your spot. If you live in an apartment and the backpack gets dropped on the kitchen floor every day? The drop zone belongs there.
The goal is not to change habits, but to build a system around them.
Tiered Solutions Based on Budget & Time
$0 and 10 Minutes: The Bare-Minimum Sanity Saver
If you do nothing else, do this:
Add a basket or box for each kid near the door. That’s it.
Label it with their name.
Everything goes in or next to that bin—backpack, homework, water bottle, etc.
This keeps things corralled and gives you a go-to spot for “MOM, I can’t find my folder!”
Bonus: Add a second bin for “Papers for Grownups” and teach your kids to drop permission slips and handouts there.
Yes, you can always buy cute containers—but honestly, back-to-school time is wild. Sometimes the best option is to grab some cardboard boxes from the garage and let each kid decorate their own with markers, stickers, or leftover paint. It’s free, it’s fast, and it gets them involved.
Under $50 and 30 Minutes
This level gets you real structure without spending much, just get 1 or 2 things to try and keep things from driving you crazy.
Shop Here


Supplies:
Wall hooks or over-the-door racks
A narrow shoe rack or bin
Hanging file folder or wall pocket
Command center clipboard or dry-erase calendar
Set up:
1 hook per kid for their backpack and coat
1 bin below for shoes (no more tripping over cleats)
Wall file folder for incoming homework or school forms
Clip a weekly schedule or calendar nearby to manage who has library books due and who needs to bring in snacks
🛠 Tip: Use removable adhesive hooks or repurpose what you already own.
Under $200 and 1–2 Hours: Stylish & Streamlined
If you’re ready for a more built-in feel without renovating:


What to buy:
Cube shelf (IKEA Kallax or similar)
Bins or baskets that fit inside (one per kid)
Wall-mounted coat rack or peg rail
Magnetic chalkboard or dry-erase board
A dedicated lunchbox shelf or tray
Why it works:
Bins hold everything from gloves to Chromebook chargers
Lunchboxes get emptied and returned to their “home”
Visual reminders (like the board) reduce morning questions by 80% (unofficial stat, very real result)
Add a "Reset the Zone" checklist near the door:
Empty lunchbox
Put away shoes
Drop papers in the inbox
Pack up for tomorrow
The Custom Dream Zone: For DIYers or Remodelers (Eventually)
We all love a perfectly styled mudroom moment on Pinterest—and yes, you can absolutely get inspired by those beautifully organized spaces. But before you jump into a full custom setup with built-ins and charging stations, test what works.


I recommend starting with one of the first two budget-friendly setups and living with it for a few weeks. You’ll learn:
What gets used daily
What gets ignored
What your kids can manage on their own
What storage you really need vs. what looks good in theory
Once you’ve field-tested your setup, then go custom. If you’ve got the time, tools, or budget, a built-in system can be a game-changer:
Bench with cubbies underneath
Locker-style vertical storage
Charging drawer or shelf for devices
Seasonal gear storage
Pinboard or corkboard per kid
But take it from us: the dream setup only works if it fits your real life. And the best way to find that out is to start small, then scale up with confidence.
Sanity-Saving Habits to Pair With Your Setup
Even the prettiest mudroom won’t help if nobody uses it. Here are habits to build into your routine:
✨ 1-Minute Backpack Check
Before dinner or while you're cleaning up, have your kid:
Empty their lunchbox
Put any papers in the inbox
Place backpack by the door, packed for tomorrow
✨ Sunday Reset
Once a week, clear out the cubbies, recycle mystery worksheets, and restock masks, snacks, or supplies.
✨ Visual Cues Work
If your kids are too young to read, use picture labels for bins and hooks. If you have older kids or teens, let them customize their area to take ownership.
Let Pinterest Inspire, Not Intimidate
Pinterest is full of gorgeous mudroom setups—and hey, if that motivates you to build your dream entryway, go for it! Just remember: the best drop zone is the one your family will actually use.
Start with what you have. Adapt as you go. Keep it simple, functional, and flexible. And above all—make it easy on yourself.


Dark wallpaper doesn't shrink rooms. It deepens them.